Title here
Summary here
🌐 To communicate with Reachy 2, your computer and the robot must be on the same network. You can do this:
Ensure your computer is on the same network as Reachy’s, preferably via a wired connection.

⚠️ Important if using ethernet: Do not plug an Ethernet cable directly between your computer and the robot. Instead, connect the robot’s Ethernet cable to your router or switch, so it becomes part of your local network—just like your computer.
Check the name of your robot at its back of neck and type it followed with .local:8000 in your web browser.
Example: for a robot called
r2-0000, typehttp://r2-0000.local:8000/in your web browser
You can also connect to the dashboard via Reachy’s IP address.
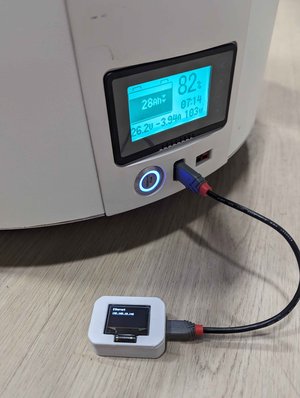
To know it, you can use the LCD screen provided. For that, turn off your robot then connect the LCD screen to the USB port on the mobile base. Reachy’s IP addresses (WiFi and Ethernet) will appear.
Open a tab in your web browser and enter Reachy’s IP address followed with :8000.
Example: for a robot with IP
192.168.0.100, typehttp://192.168.0.100:8000/in your web browser
Click on “Reachy awake” to confirm that Reachy is well set-up.
After unpacking Reachy be sure to book your kick-off meeting with one of our engineer at .
This meeting usely lasts one hour but can be extended depending on your needs. During this meeting, we will review together the whole functionalities of Reachy and its infinite capabilities.