Teleoperate Reachy
How to use the VR teleoperation application
In brief
Start teleoperating Reachy
Make sure the robot is turned on, connected to the network and that all the robot’s services are running before launching the teleoperation application.
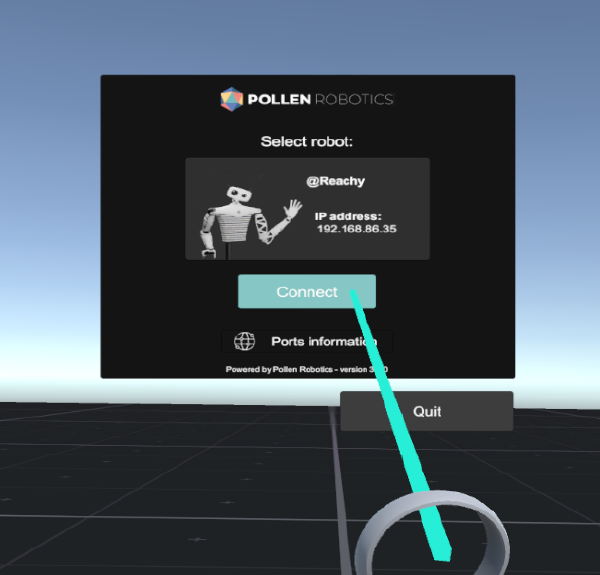
Select the robot you want to teleoperate (or create a new one), and click on “Connect”.
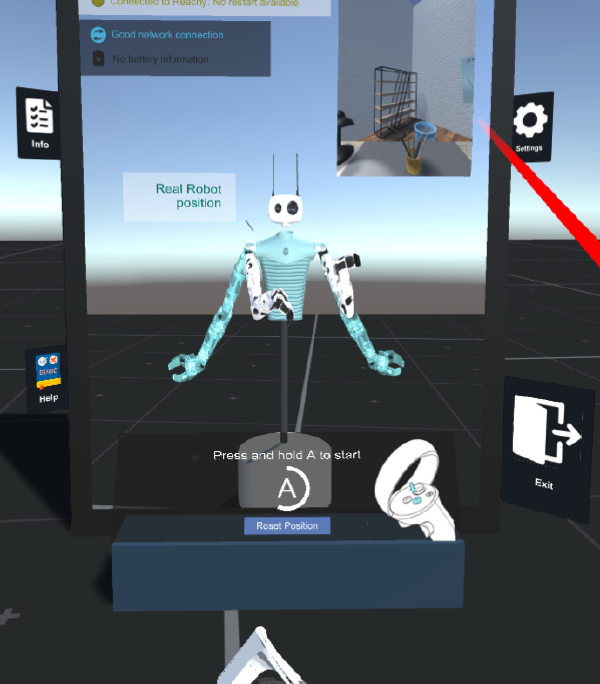
Get familiar with the controls in the mirror room and the virtual robot. You may configure various settings here. When you are ready press “Ready”, and hold (A).
Look straight ahead, with your body in the same orientation as your head while pressing A to start the teleoperation. The initial head position is used to determine the coordinate system giving your VR controllers position.
- Come back any time to mirror room by holding A. Teleoperation of the robot is automatically paused if the headset is removed.
Stop teleoperation
Come back to the mirror room to pause the teleoperation by holding A at any time during teleoperation.
Leave the app by clicking “Quit” icons in the mirror room and connection menu.
The motors are automatically turned into compliant mode when quitting the mirror room. Please make sure the arms are close enough to the lowest position they can reach when coming back to the menu to avoid them falling or hitting something.
Step-by-step starting
Make sure that your VR equipement is up and running. Please refer to your device documentation.
Make sure the robot is turned on, connected to the network and that all the robot services are running. By default, if you haven’t modified anything, all services should be automatically launched on start of the full/starter kit robots.
Launch the application TeleoperateReachy.exe file if you are using a VR device connected to a Windows computer. For Oculus Quest users, start the app from within the headset if you have installed the .apk.
Equip yourself with your headset, make sure you can see both controllers and that the scene around you is moving correctly in accordance with your head movements.
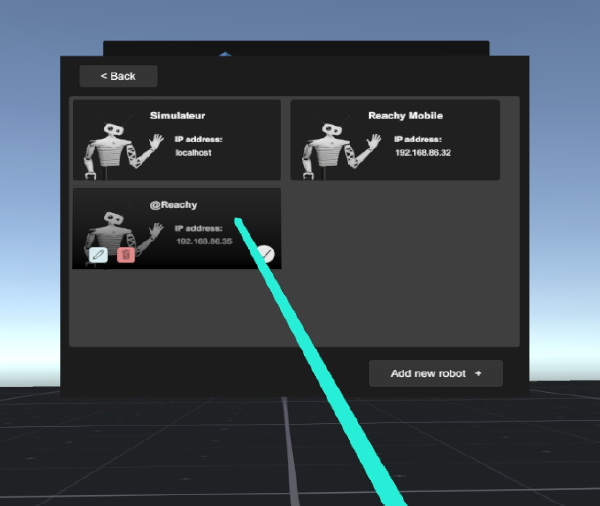
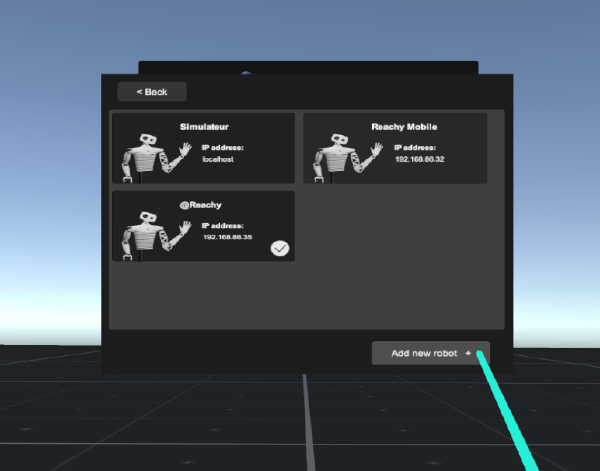
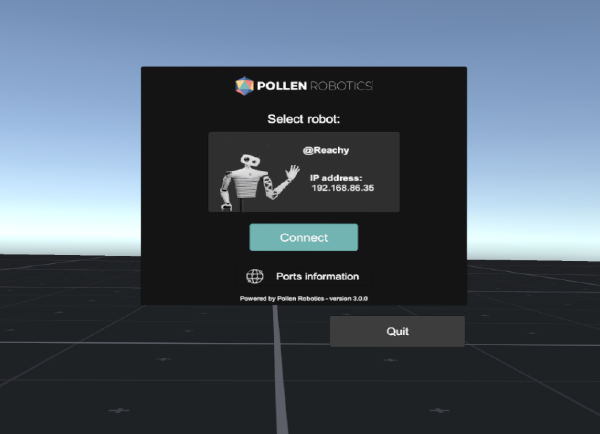
Choose the robot you want to connect to: you can select a robot with its IP address, or add a new one to the list of available robots.
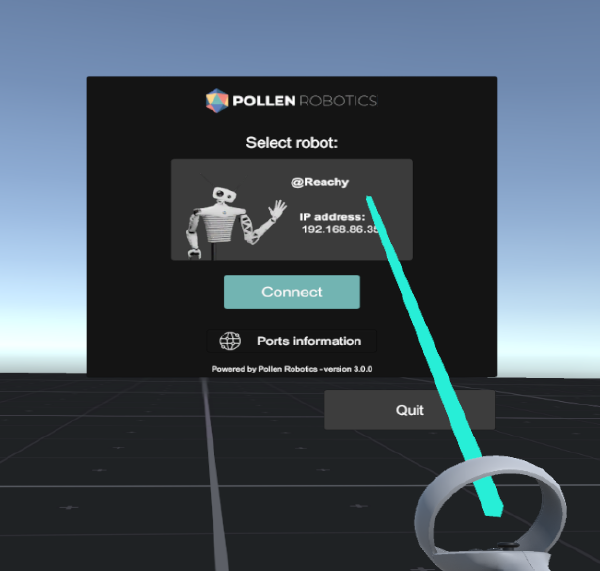
- Press Connect to initiate the communication with the robot.
- You should be now in the mirror room, and see yourself controlling a virtual reachy. The actual robot is not in control at that time but the live camera stream is displayed at the top right of the mirror. The info, help and settings menus are available here (they are documented in the next section). Please get familiar with the robot controls and features (emotion, grasping lock).
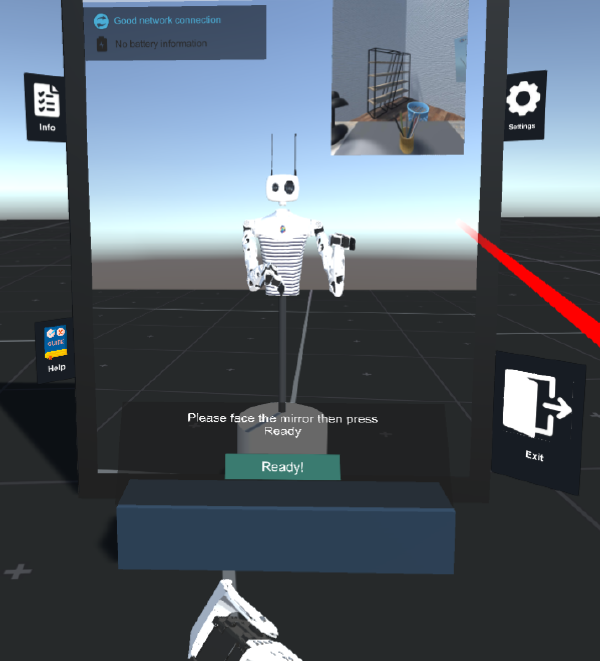
- When you are ready, face the mirror completely and click on “Ready”. The position of the actual robot appears in a semi-transparent green color. This may be useful when you’ve left the robot in a certain position that you would like to keep when entering the teleoperation. Hold (A) to start the teleoperation.
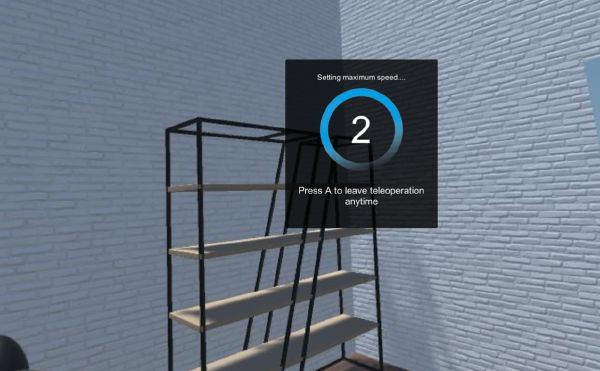
- A 3 seconds timer appears while you enter the teleoperation. The motors speeds are reduced during this time to avoid sudden movements of the robot. Full speed is reached at the end of this countdown.
- Come back any time to menu by pressing A. Teleoperation of the robot is automatically paused if the headset is removed.
Control the mobile base
Use the thumbstick/trackpad to control the mobile base!
The left controller controls the translation of the mobile base, while the right one controls the rotation.
Is there any security to prevent collision with objects?
Yes! If you are too close to a wall or object, the LIDAR anti-collision safety unables the mobile base to go closer to the obstacle. The mobile base will therefore not move in this direction, but you can still go in other directions.
More information on the anti-collision safety
Nevertheless, this security is for the mobile base and won’t prevent the robot’s arms to collide with external objects, so be aware while teleoperating the robot.
Please note very small objects won’t be detected by the LIDAR sensor.
What is the forward direction of Reachy?
The forward direction is aligned with the forward direction of the mobile base, meaning that giving a forward instruction to the robot will always lead the robot to go physically forward, no matter the direction you are looking to.
Check the actual direction of your commands using the indicator at the bottom: the white arrow shows you the direction command relative to your actual head orientation. If your head is correctly aligned with the mobile base forward direction, this arrow will point forward if giving a forward command with your left controller.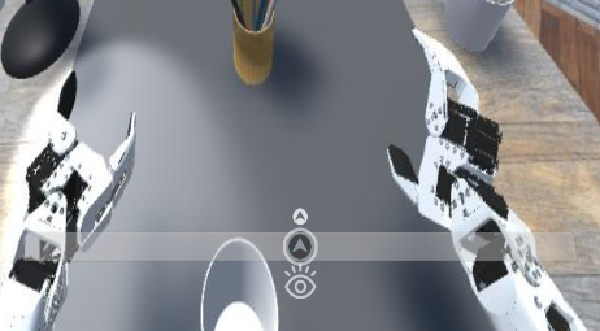
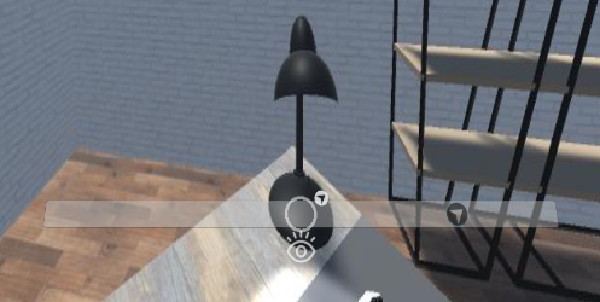
In the above images, the same forward command is sent from the left controller.
On the first image, the user is looking straight (the black arrow is located in the target view), so the white mobility arrow is pointing front.
On the second image, the user is looking on the left side (the target view is on the left of the black arrow), so the forward direction is pointing right, as it is the direction aligned with the mobile base forward direction.
Note that these images are only for example, mobility is not available on virtual Reachy.
Use Reachy’s emotions
Press (X) (on Oculus Quest 2, check here the input corresponding to your device) when controlling Reachy to open the emotion menu. Use the right thumbstick/trackpad to select the desired emotion icon and release (X).
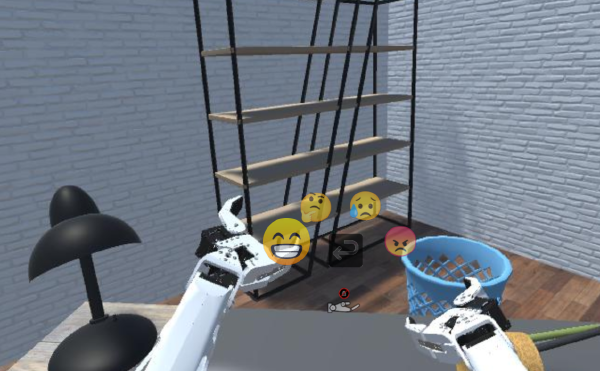
Emotion (movement of antennas) are triggered here. The grasping lock can be also activated from this menu.
Application features
Connection page
Click on the robot to select to open the panel of all saved robots:
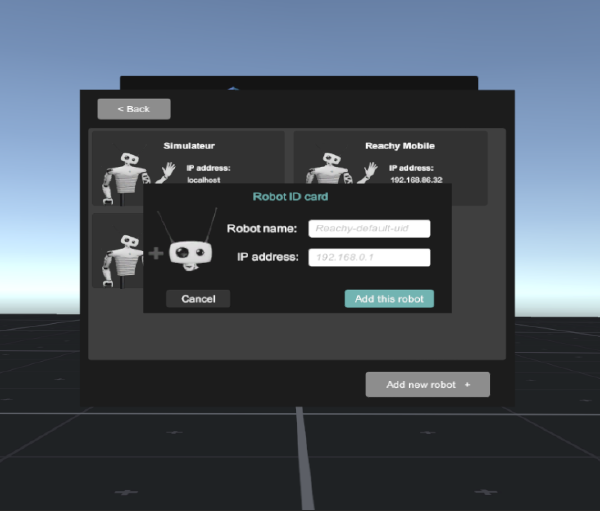
Then click on "Add new robot +" at the bottom right of the page:
 Enter a robot name and the IP address of the robot (if the headset is connected on a computer, use the computer keyboard), and save your robot card:
*The IP address is mandatory. If no name is given to the new robot, it will be called @Reachy by default*
Enter a robot name and the IP address of the robot (if the headset is connected on a computer, use the computer keyboard), and save your robot card:
*The IP address is mandatory. If no name is given to the new robot, it will be called @Reachy by default*
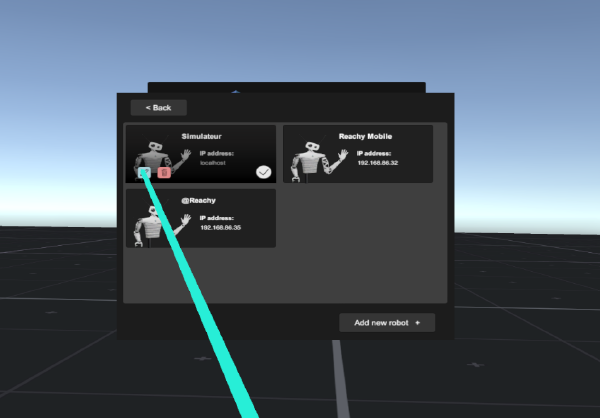
Click on the robot to select to open the panel of all saved robots:
Then click on the pencil icon of the robot you want to modify:
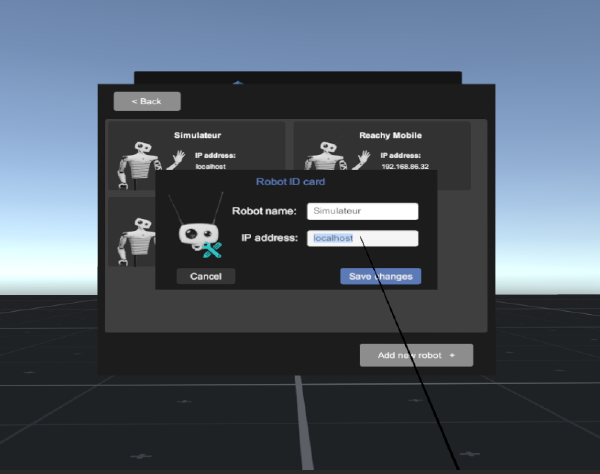
 Modify the info on the robot card and save the card:
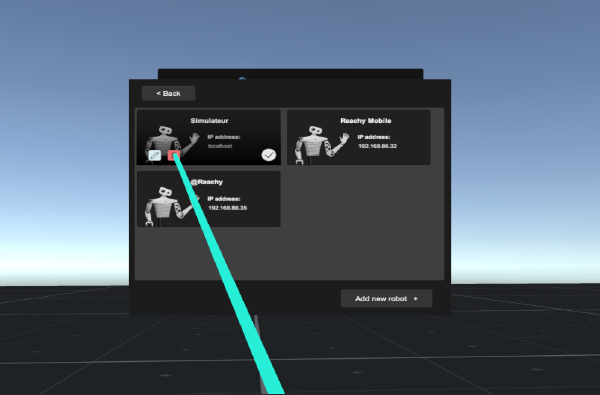
Click on the robot to select to open the panel of all saved robots:
Then click on the bin icon of the robot you want to delete:
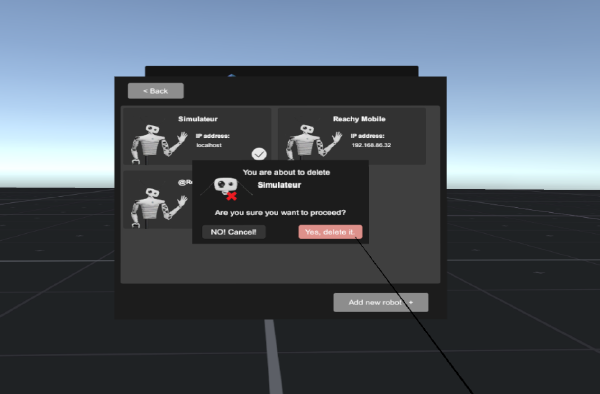
 Validate the deletion:
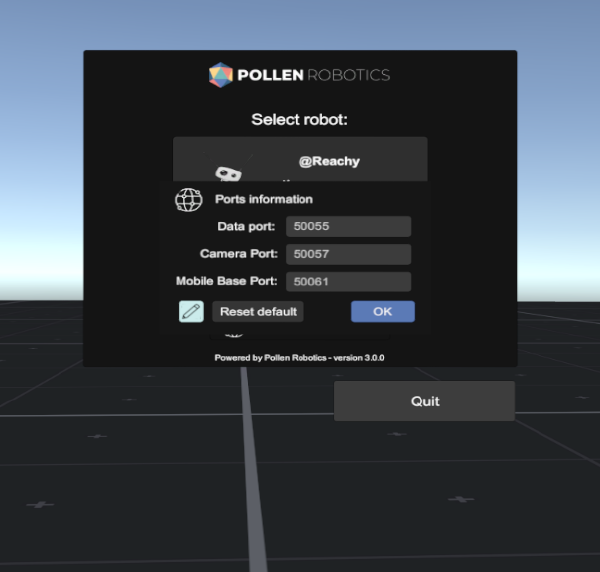
Click on “Ports information” in the connection menu, below the Connect button.
 Find there the info of all the gRPC ports used. You can also modify them if you made changes on your robot:
Mirror scene
Open the info menu in the mirror room:
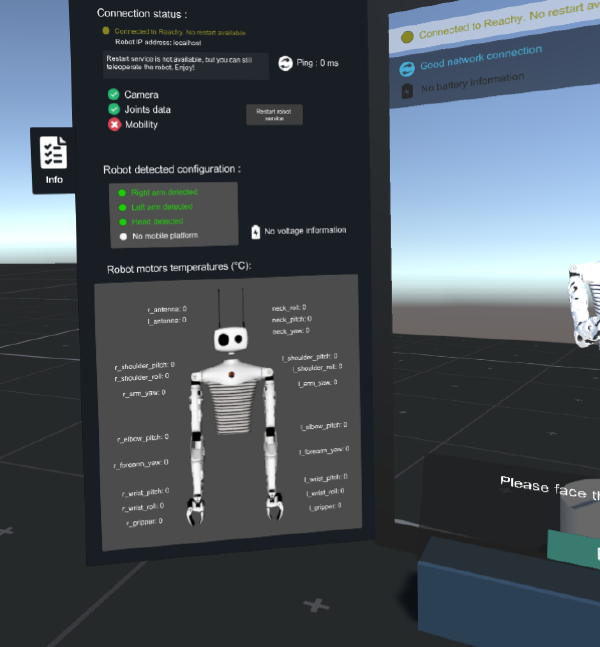 The connection and services status, and motor temperature are reported here.
Open the help menu in the mirror room:
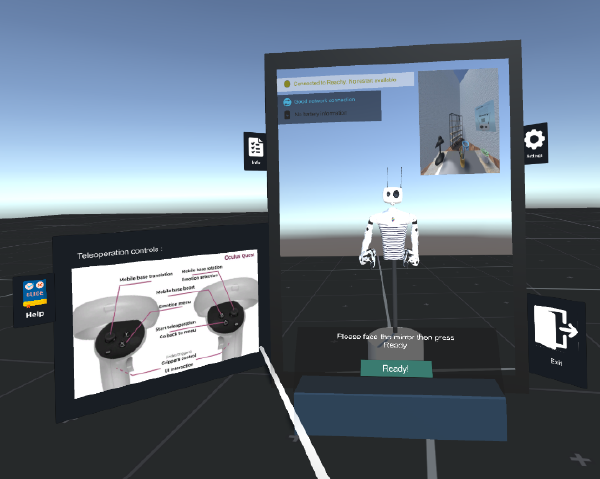 The mapping of the controller buttons to the robot actions are displayed here.
Open the settings menu in the mirror room:
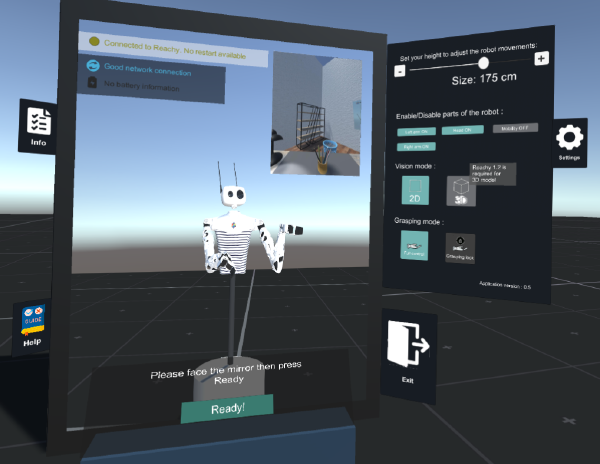 Here you can set your size to improve the mapping between your movements and reachy's motion. Individual parts of the robot can be deactivated in the case you don't need the mobile base, a specific arm, etc.
You can also modify the grasping mode there: with full control you decide at each time the opening of the gripper, while the grasping lock option enables you to close the gripper with on trigger press and open it with another one. Grasping lock option can be turned on/off as well in the emotion menu.
Here you can set your size to improve the mapping between your movements and reachy's motion. Individual parts of the robot can be deactivated in the case you don't need the mobile base, a specific arm, etc.
You can also modify the grasping mode there: with full control you decide at each time the opening of the gripper, while the grasping lock option enables you to close the gripper with on trigger press and open it with another one. Grasping lock option can be turned on/off as well in the emotion menu.While facing the mirror, your body should be aligned with Reachy’s body. This is mandatory to have a consistent control. If this is not the case after having pressed “Ready”, face the mirror and click on “Reset position”.
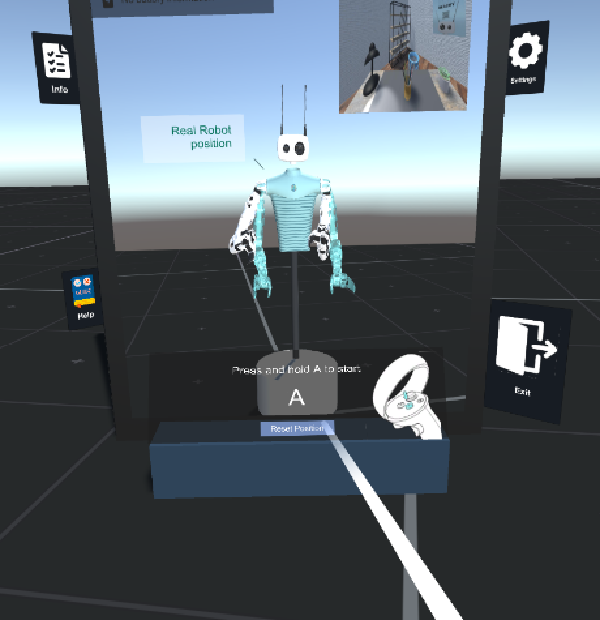 The "Reset position" button is placed at the bottom of the mirror, under the A loader.
Teleoperation exit
While press (A) to exit the teleoperation, you may hold (X) to activate the position lock. A lock is displayed when doing so.
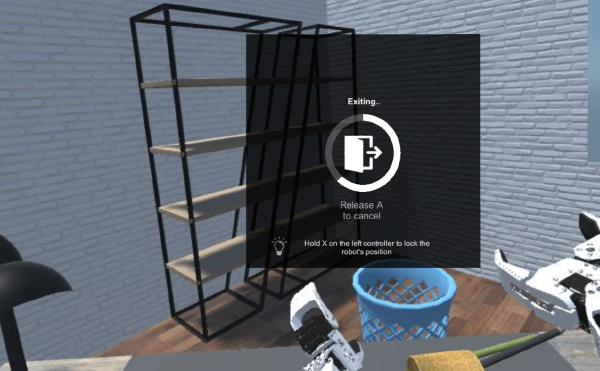 The robot will stayed locked while you'll be back in the mirror room. This can be useful to keep a certain position while you need to take a break, change position or remove the headset. The position of the robot will be displayed by the semi-transparent green robot when you will restart the teleoperation.